A7(#9) Guitar Chord | Play, Hear and Practice Interactively
Want a structured chord roadmap instead of jumping between pages?
Go to the full guitar chords tutorial.
The iconic A7(#9) chord, often dubbed the 'Jimi Hendrix chord', is a vibrant member of the Dominant Chords family. It's built from the notes A, C#, E, G, and B#, corresponding to the intervals 1 (Root), 3 (Major Third), 5 (Perfect Fifth), b7 (Minor Seventh), and #9 (Augmented Ninth). Explore every possible fingering instantly with the interactive fretboard tool on this page, practice playing it with real-time microphone feedback to perfect your technique, and hear its distinct sound through chord or arpeggio playback.
The A7(#9) chord delivers a distinct, sophisticated sound that adds a rich flavor to jazz, blues, and rock music. If you're curious about why this chord sounds so unique and how it functions harmonically, dive deeper into the world of Dominant Chords and explore the full range of Ninth Chords. Understanding how these intricate chords are put together can supercharge your playing – our Chord Construction tutorial will guide you. Once you have a few fingerings under your belt, focus on smooth transitions with our tips to Improve Chords Change.
As you scroll down, you'll discover a wealth of information, including comprehensive chord diagrams (ranked from easiest open positions to more advanced voicings), deeper insights into the music theory behind the A7(#9) chord, songs where it features prominently, and the musical keys in which it commonly appears. But before you delve into the diagrams, make sure to spend some quality time with the interactive tool above. Let the microphone feedback guide you to precise finger placement and listen to the chord in action – it's the most effective way to truly master the A7(#9) and integrate it into your playing.
A 7(#9) chord Notes:
How to create the Dominant Seventh Sharp Ninth Added chord:
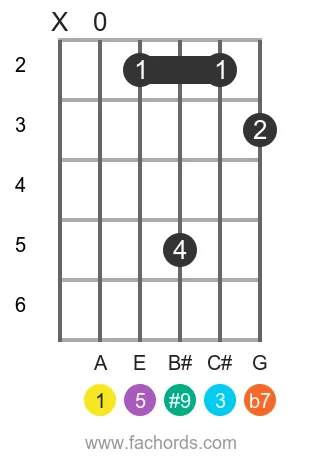
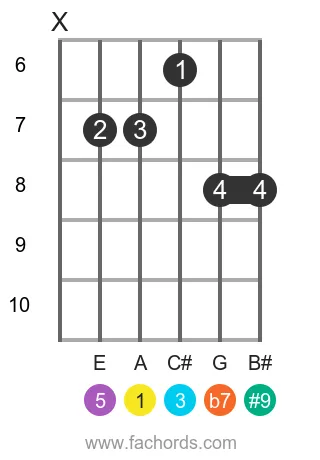
A Dominant Seventh Sharp Ninth Added Guitar Chord Fingers Positions
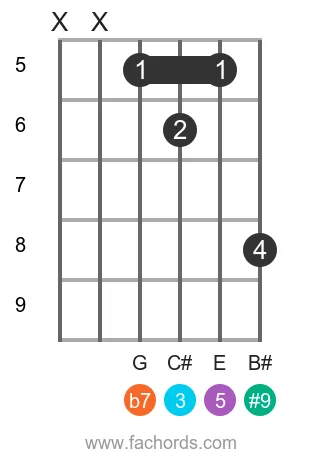
Position 1
Movable
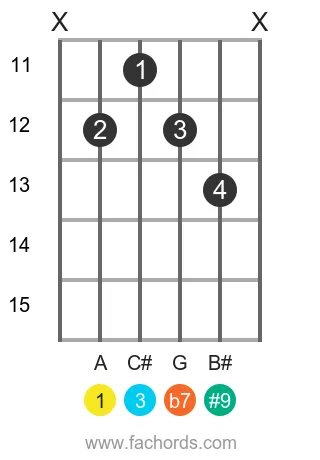
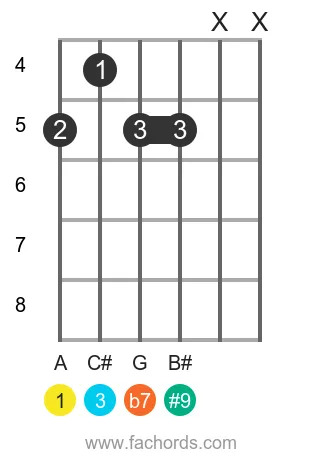
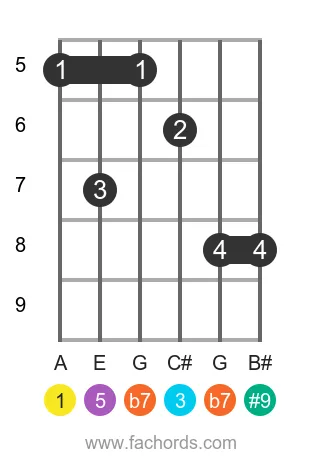
Position 2
Movable
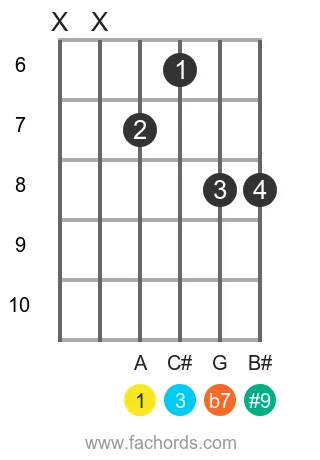
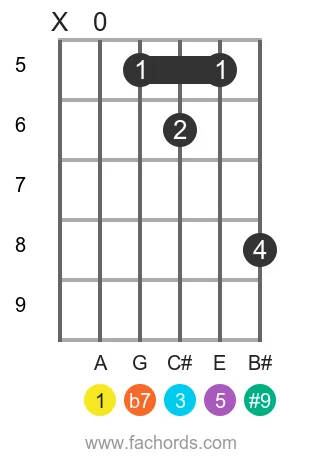
Position 3
Open
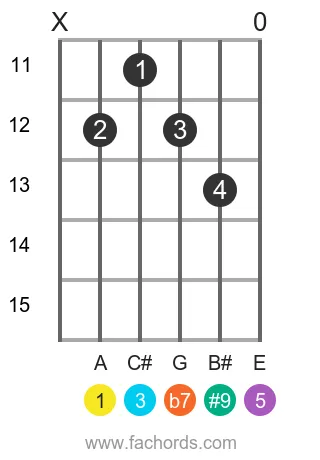
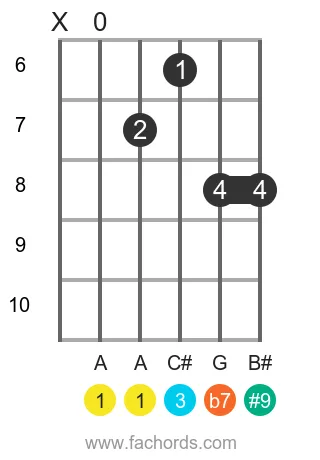
Position 4
Barre
Movable
Position 5
Barre
Movable
Position 6
Barre
Open
Position 7
Barre
Open
Position 8
Barre
Open
Position 9
Barre
Movable
Position 10
Barre
Movable
 Find more shapes in our all guitar chords online library. If you
prefer a printable pdf, download
the Free Guitar Chords Chart Pdf
Find more shapes in our all guitar chords online library. If you
prefer a printable pdf, download
the Free Guitar Chords Chart Pdf
You can also use this accessible A7(#9) chord page, with written diagram instructions and screen-reader support for blind users.
FAQ
What are the notes that make up the A7(#9) chord?
The A7(#9) chord is composed of five distinct notes: A, C#, E, G, and B#. These notes are derived from specific intervals, giving the chord its unique harmonic structure.
What specific intervals build the A7(#9) chord from its root?
The A7(#9) chord is constructed using these intervals from its root note (A): the 1 (Root), 3 (Major Third), 5 (Perfect Fifth), b7 (Minor Seventh), and #9 (Augmented Ninth). Each interval contributes to the chord's characteristic sound.
Why is the A7(#9) chord also known as the 'Jimi Hendrix chord'?
The A7(#9) chord earned its popular nickname, the 'Jimi Hendrix chord,' due to its distinctive and frequent use by the legendary guitarist Jimi Hendrix in many of his iconic songs, embedding it in the lexicon of rock music.
How does the A7(#9) chord fit into the 'Dominant Chords' family?
The A7(#9) is classified as a dominant chord because it contains the essential components of a dominant 7th chord (Root, Major Third, Perfect Fifth, and Minor Seventh). The added #9 (Augmented Ninth) is an extension that enhances its dominant tension and unique sonic quality.
What is the significance of the '#9' in the A7(#9) chord name?
The '#9' in the A7(#9) chord name indicates an Augmented Ninth interval. This specific interval is key to the chord's distinctive and sophisticated sound, introducing a characteristic tension that sets it apart from a standard dominant 7th chord.
Why is the note B# used in the A7(#9) chord instead of C?
Although B# sounds enharmonically equivalent to C, theoretically, B# is the correct spelling for an Augmented Ninth interval above A. Using B# maintains the proper theoretical construction of the chord, ensuring correct interval stacking and understanding its musical function.
In what musical styles is the A7(#9) chord commonly employed?
The A7(#9) chord is a versatile and expressive chord frequently found in jazz, blues, and rock music. Its unique sound allows musicians to add sophistication and a distinctive flavor to their chord progressions within these genres.