Master the B 7 Chord for Guitar with Real-time Feedback
Want a structured chord roadmap instead of jumping between pages?
Go to the full guitar chords tutorial.
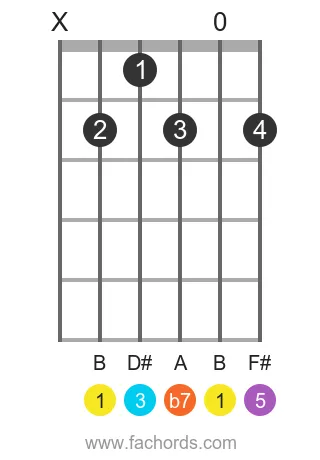
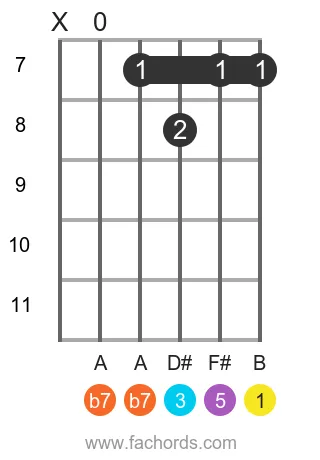
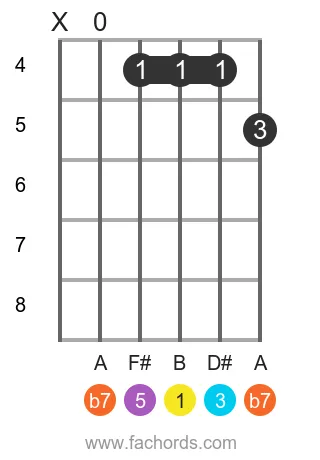
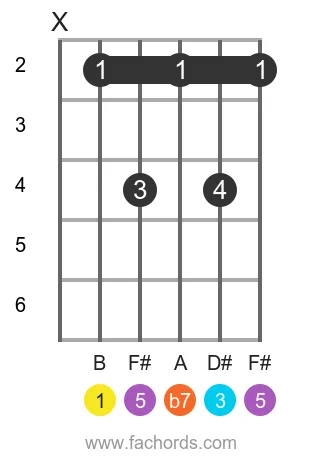
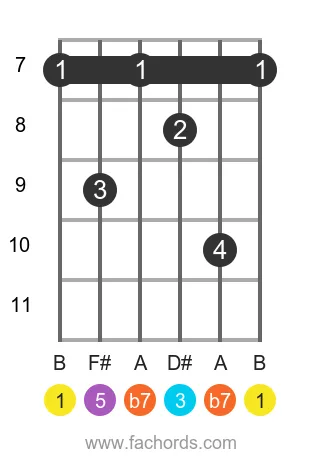
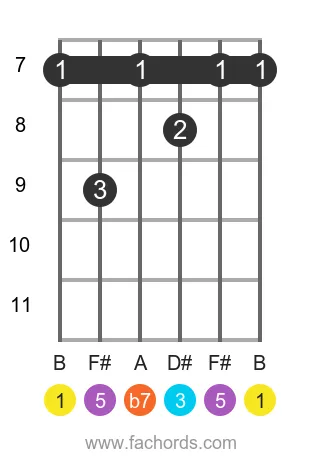
Ready to conquer the B 7 chord on your guitar? Challenge your playing with our interactive fretboard, which provides real-time mic feedback to confirm your accuracy. This essential dominant chord is built from the notes B, D#, F#, and A, corresponding to the intervals 1, 3, 5, and b7 (Root, Major Third, Perfect Fifth, and Minor Seventh, respectively). You can also hear the chord and its arpeggio playback.
Understanding the B 7 chord and its construction can unlock a world of sound. As a dominant chord, it introduces a natural tension that typically resolves to a tonic, a hallmark of blues, jazz, and rock music. For those new to how chords are built by stacking intervals, our chord construction tutorial offers an excellent foundation. You can also explore the broader family of dominant guitar chords to deepen your harmonic understanding, or specifically learn about 3-note 7th chords to simplify your voicings.
Scroll down to find comprehensive chord diagrams for the B 7 chord, presented from the easiest voicings to more challenging shapes. Beyond just theory, you'll see how this chord functions in various keys and can be applied in numerous songs. We encourage you to first use our interactive tool to test your playing and solidify your understanding before diving into the static charts. Get ready to put your skills to the test and make some music!
B 7 chord Notes:
Chord structure of the Dominant Seventh chord:
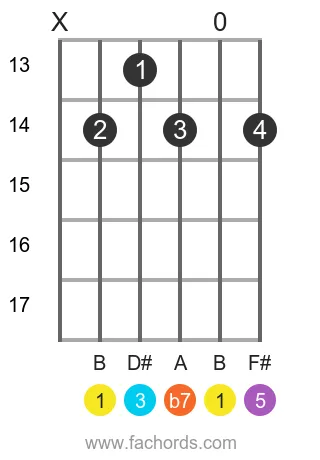
B Dominant Seventh Guitar Chord Fingers Positions
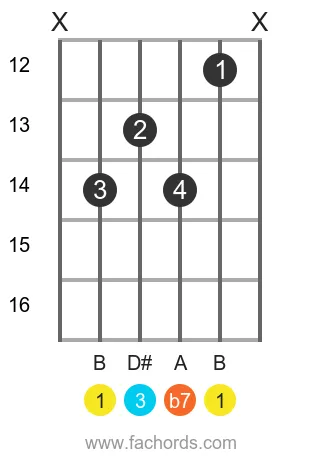
Position 1
Movable
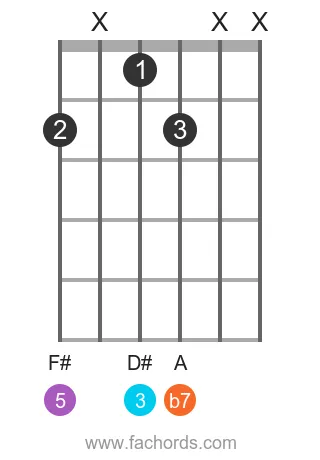
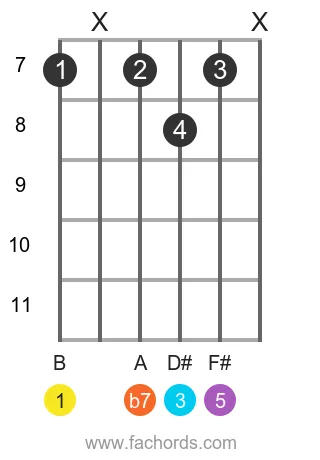
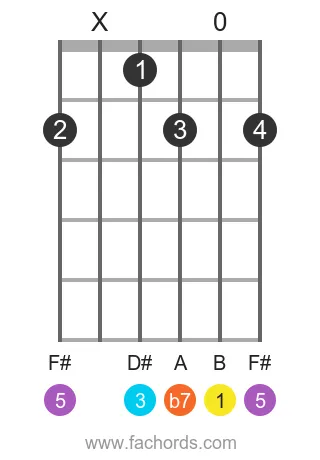
Position 2
Movable
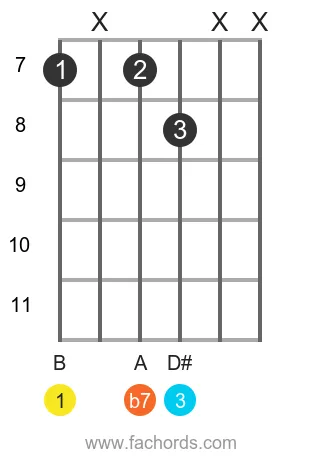
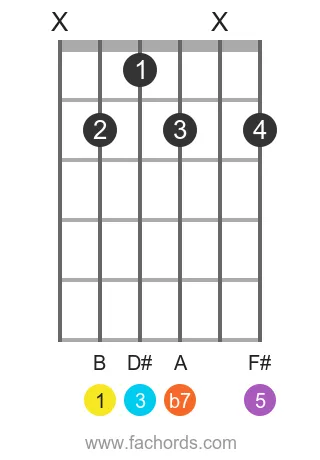
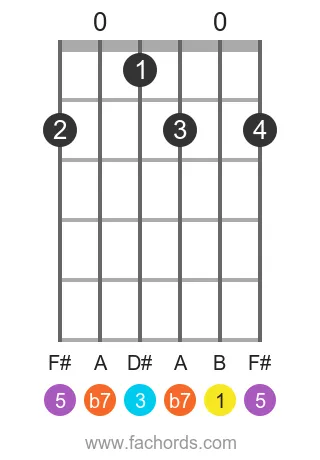
Position 3
Open
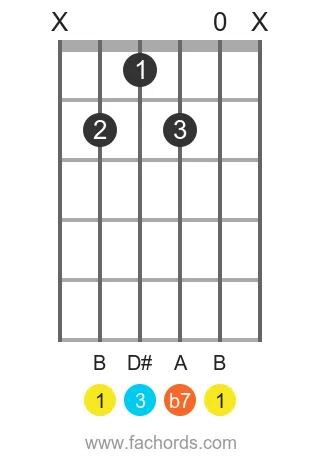
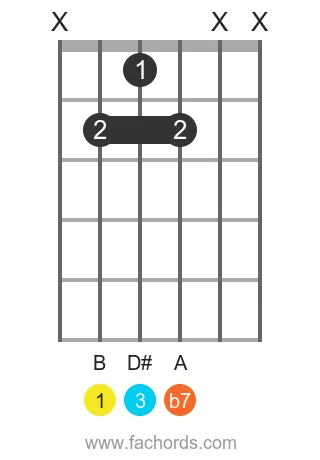
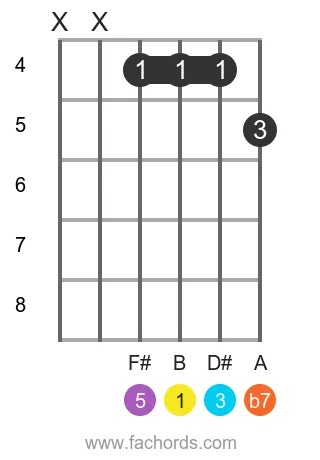
Position 4
Movable
Position 5
Movable
Position 6
Movable
Position 7
Open
Position 8
Barre
Movable
Position 9
Open
Position 10
Open
Position 11
Open
Position 12
Barre
Movable
Position 13
Barre
Open
Position 14
Barre
Open
Position 15
Barre
Movable
Position 16
Barre
Movable

Position 17
Barre
Movable
Position 18
Barre
Movable
 Find more shapes in our all guitar chords online library. If you
prefer a printable pdf, download
the Free Guitar Chords Chart Pdf
Find more shapes in our all guitar chords online library. If you
prefer a printable pdf, download
the Free Guitar Chords Chart Pdf
You can also use this accessible B7 chord page, with written diagram instructions and screen-reader support for blind users.
FAQ
What notes and intervals make up the B7 guitar chord?
The B7 chord is constructed from the notes B, D#, F#, and A. These notes correspond to the intervals of the Root (1), Major Third (3), Perfect Fifth (5), and Minor Seventh (b7) respectively, all measured from the root note B.
Why is the B7 chord referred to as a 'dominant chord'?
The B7 chord is a member of the dominant chords family because it contains a minor seventh interval (b7). This specific interval gives dominant chords their characteristic sound and harmonic function, often creating a sense of tension that leads to resolution in a musical progression.
What is the significance of the intervals 1, 3, 5, and b7 in the B7 chord?
These intervals define the specific sound and quality of a dominant 7th chord. '1' is the root note (B), '3' is the major third (D#), '5' is the perfect fifth (F#), and 'b7' is the minor seventh (A). Understanding these intervals is key to recognizing and building dominant chords.
In what musical genres is the B7 chord commonly used?
The B7 chord, being a dominant chord, is widely used across many musical genres. It is particularly prominent and fundamental in blues, jazz, and rock music, where its unique harmonic tension and resolution properties are frequently employed.